Maker’s notebook · 7 min read
How to paint 3D-printed miniatures for a realistic finish
Prepare a miniature print, build thin layers of colour, and suggest wood, painted furniture or upholstery without burying small details.
Updated
Realism in miniature often comes from restraint. A chair does not need deep black shadows in every corner, and a wood tabletop does not need oversized grain lines. A convincing finish suggests the material while keeping the object’s scale readable. Start with a limited palette and add texture only where it helps describe the form.
The colour recipes below are creative starting points, not measured matches to a particular timber or paint brand. Test them on a spare print or the underside of a base. Your primer, room lighting and final varnish all change the appearance, so keep a sample beside the miniature while you work.
Finish print processing before painting
For resin, complete the material’s required washing, drying and curing process before surface preparation. Follow its instructions for safe handling and waste. Paint does not replace curing or make an incompletely processed print suitable to handle. Keep contaminated tools separate from your painting equipment.
For either process, remove supports carefully and inspect the model under a light from the side. This makes ridges, support nubs and shallow depressions easier to see. Check the feet and assembly surfaces as well as the front: a beautiful painted chair is frustrating if it cannot stand squarely.
Use the material and finishing-product instructions when choosing abrasives, ventilation and protective equipment. Avoid blowing sanding dust into the workspace. Work on fully processed material and collect debris appropriately. The Prusa resin safety overview is useful background for separating resin handling from later craft work.
Prepare only as much as the surface needs
Support marks on a broad tabletop may need more attention than marks beneath a seat. Protect fine mouldings and carved edges while smoothing a nearby flat area. The goal is to remove the defect, not to make every surface equally polished or round away the original shape.
Dry-fit separate components before adding finish. If a locating pin is tight now, several layers of primer and paint will not improve it. Keep mating surfaces free of paint when the assembly design allows, and decide which parts are easier to paint separately.
Formlabs describes cleaning up surfaces and using primer to reveal remaining defects in its guide to priming printed parts. For miniature work, the same preparation logic should be applied gently: inspect, correct, prime lightly and inspect again. Avoid using a heavy coat to conceal a problem that needs local correction.
Choose a small, coherent palette
Before painting, place your miniature beside the room’s wall, floor and fabric samples. Pick one main furniture colour, one shadow colour and one highlight colour. A small accent can be added later. This keeps a room visually connected even when its pieces come from several designs.
If the room’s direction is still open, use the dollhouse style guide to choose an anchor piece and a background that lets its outline show. Resolve repeated surface defects with the printing workflow before trying to hide them beneath paint.
| Intended material | Main colour idea | Shadow idea | Highlight idea | Finish direction |
|---|---|---|---|---|
| Pale oak suggestion | Warm beige | Muted brown | Cream | Matte or low satin |
| Dark walnut suggestion | Medium brown | Brown-black | Soft ochre-brown | Restrained satin |
| Chalk-painted cabinet | Warm off-white | Grey-beige | Pale cream | Matte |
| Painted metal | Muted green or black | Darker local colour | Small edge accents | Satin where appropriate |
| Upholstered seat | Muted fabric colour | Deeper version of base | Slightly lighter base | Matte |
These combinations describe a direction, not mandatory mixtures. If a dark walnut sample looks almost black in your room, lighten the base before adding more highlights. It is easier to establish the overall value correctly than to rescue it with a web of bright streaks.
Apply primer and base colour in thin coats
Choose a primer compatible with both the printed material and the paint system. Follow the product’s application, ventilation and drying instructions. Test on an inconspicuous area or spare sample, especially when using a combination of materials you have not tried before.
After the primer dries, inspect the miniature from several angles. Primer often makes a support mark easier to see because it removes distracting changes in the material’s original colour. Correct isolated defects before applying the decorative finish.
Build the main colour with controlled, thin coats. Avoid flooding recesses or repeatedly brushing an area while it is starting to dry. Support the miniature by an unpainted surface or temporary holder so that you are not rubbing freshly painted chair arms between your fingers.
Paint the underside when it will be visible in photographs or handling, but keep the process practical. A hidden area needs a clean finish; it does not need the same elaborate grain effect as the tabletop. Work from broad areas toward smaller details to reduce accidental marks.
Suggest wood with direction and variation
Begin with an even mid-tone base. When it is dry, add a few thin, translucent strokes that run in the direction a board’s grain would follow. On a tabletop, choose the board direction deliberately; on a leg, follow its length. Avoid making every surface carry identical parallel stripes.
Use subtle variation between adjacent boards or panels. One panel can be slightly warmer and another slightly cooler, while staying within the same overall family. The variation should become apparent when looking closely, rather than dividing the miniature into strongly contrasting blocks.
Grain marks must become finer as the scale gets smaller. At 1:48, a few shifts in colour may read more naturally than individual dark lines. For a tiny cabinet, paint the structure clearly and let the silhouette carry most of the detail.
Before adding another layer, put the object back into the room and view it from the normal distance. A texture that looks exciting under magnification can become distracting in the scene. If the wood effect dominates the entire room, soften it with a thin layer of the base colour.
Use shadows to describe joints, not dirt
Place a darker, translucent colour where two parts meet: beneath a tabletop, around a recessed panel or between cushion shapes. Use the same family as the base colour when possible. Brown shadows suit some woods, while a grey-green shadow may suit a painted green cabinet better.
Keep control of the liquid. A wash that pools on a flat seat can dry with an unintended ring. Use a clean brush to remove excess before it sets, and follow the paint manufacturer’s guidance if adding water or medium. Test dilution rather than assuming one mixture works across every brand.
Highlight the surfaces that would catch the room’s light. A narrow accent on the upper edge of a drawer can clarify its shape. Covering every edge equally tends to flatten the lighting and makes the object look outlined. Choose a light direction and keep it consistent across neighbouring pieces.
Paint upholstery and worn finishes selectively
For a fabric seat, start with a matte base and gently vary the cushion centres and seams. Use broad, soft changes rather than coarse speckles. A pattern needs careful scaling; sometimes a plain colour with a convincing fold is more effective than an oversized imitation weave.
For painted furniture, decide whether the piece is new, gently used or heavily worn. Place wear where contact would be plausible: a drawer pull, an exposed corner or the edge of a seat. Do not scatter identical scratches randomly across protected panels and hard-used edges.
Try the effect on one discreet corner first. If it tells the intended story, repeat it sparingly. A clean Scandinavian room may need almost no wear; a greenhouse workbench can support more variation. Let the setting determine the amount of texture.
Seal, assemble and assess in the room
Use a compatible clear finish only after the underlying paint has dried as directed. Test it on your sample because varnish can change colour depth and sheen. Matte, satin and gloss are visual tools; a single sheen across every material can make a mixed furniture group look less convincing.
Assemble the parts according to the file’s instructions and the adhesive manufacturer’s guidance. Keep adhesive away from finished visible surfaces and dry-fit again before committing. If the fit has tightened, investigate paint buildup at the joint rather than forcing a delicate printed leg.
Photograph the completed piece in its room under the intended lighting. Compare it with the sample and record the colours, sequence and final finish. That record is especially valuable when you add matching furniture months later. A small, repeatable recipe gives a collection more coherence than a complicated finish that you cannot reproduce.
Common questions
Can I paint a resin print immediately after printing?
Complete the resin manufacturer’s washing, drying and curing process first. Painting is not a substitute for post-processing or a way to make uncured resin safe.
Will paint hide visible layer lines?
Thin paint follows the surface. Prepare visible defects before painting; thick coats can fill details while leaving larger ridges visible.
From the cabinet
Try it with a real design.
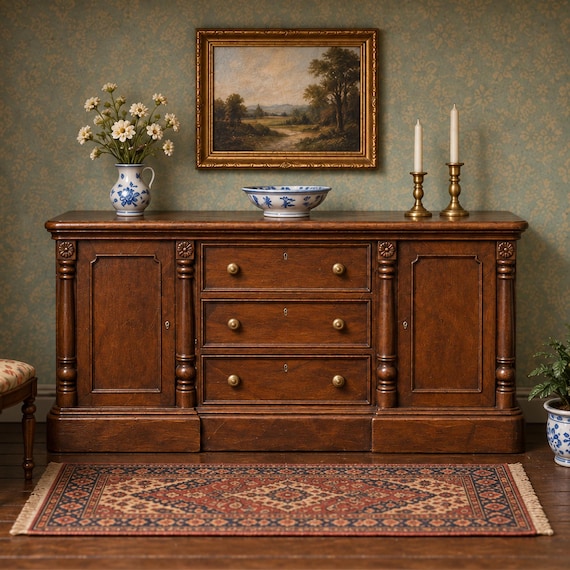
Victorian Dining Sideboard With Central Drawers
The sideboard’s larger panels give you areas to establish a restrained wood tone. Keep contrast at panel edges subtle so the mouldings stay readable.
- 1:12
- 150.0 × 56.2 × 68.9 mm
- 1:24
- 75.0 × 28.1 × 34.4 mm
Dimensions of the supplied files: width × depth × height. Room scenes illustrate the design; they are not physical print test records.
Check this piece’s details and sizes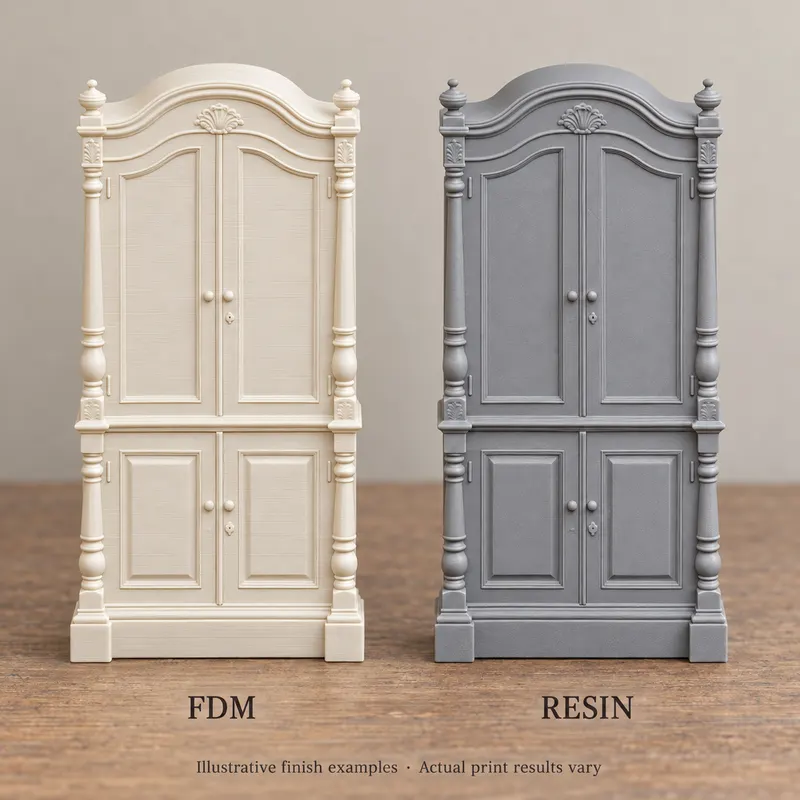
Victorian Arched Closed Display Cabinet
An arched cabinet gives you a clear outline to preserve. Build thin coats around the relief instead of filling the small recesses with paint.
- 1:12
- 86.1 × 39.7 × 154.2 mm
- 1:24
- 43.1 × 19.9 × 77.1 mm
Dimensions of the supplied files: width × depth × height. Room scenes illustrate the design; they are not physical print test records.
Check this piece’s details and sizes