Maker’s notebook · 7 min read
How to 3D print dollhouse furniture: resin and FDM
Choose a process for the scale and detail you need, check an STL in your slicer, and troubleshoot a first miniature furniture print.
Updated
The best first miniature print is a shape you can inspect easily: a small cabinet, a simple table or a chair with substantial legs. Start with one object at one scale. Once you understand how its underside, joints and visible surfaces behave on your printer, use that experience to choose the next piece.
This guide is a preparation workflow, not a universal printer profile. Exposure, temperature, cooling and support settings depend on the machine and material. Use their documented profiles as the starting point, and treat settings supplied with a model as additional context. A successful print on one setup is useful evidence, but it is not a guarantee for another.
Choose resin or FDM for the actual geometry
Look at the smallest important feature, not just the overall size of the furniture. Our resin vs FDM comparison sets manufacturer feature sizes against the scales each design was checked at. A large ornate chair can contain finer details than a much smaller plain stool. The visible silhouette, the thickness of joints and the location of supports all affect the choice of process.
| Project feature | Questions to ask for FDM | Questions to ask for resin |
|---|---|---|
| Broad flat tabletop | Which face should touch the bed? | How will the broad surface be oriented and supported? |
| Slender chair legs | Are the toolpaths continuous and substantial? | Can supports be removed without damaging the legs? |
| Carved ornament | Does the slicer retain the detail? | Where can support contact marks be hidden? |
| Small-scale room set | Is a simplified version available? | Are thin pieces strong enough to handle afterward? |
| Multi-part cabinet | Will the joints fit after painting? | Can every part be washed and cured appropriately? |
For FDM, the nozzle and extrusion width constrain narrow features. Prusa’s modelling guidance explains why walls that are too narrow for the planned extrusion can be omitted. That makes the layer preview an essential check: the shaded 3D model alone does not tell you what will actually be printed.
Resin can be useful for fine decorative work, but small detail is only one part of the decision. Include the space and equipment needed for handling liquid resin, washing and post-curing. Follow the material’s safety data sheet and printer instructions for ventilation, protective equipment and waste handling. Prusa’s resin safety overview explains why exposure precautions extend beyond the printing step.
Read the pack before opening the slicer
Check the filename, intended scale, dimensions and included variants. A pack may contain one mesh exported at several sizes, or separate versions with adjusted geometry. Those are different things. If you have not bought a file yet, the first STL checklist covers what to compare before downloading. Do not assume that an “FDM” mention means a thickened file is included unless the contents explicitly identify it.
Find out whether the files are supported or unsupported. Supports prepared for one resin profile may need review on another printer. A 3MF can contain different kinds of information depending on how it was created; our pipeline exports geometry and units, not a calibrated printer project. Select your own machine and material profile after import. What the download contains shows the STL and 3MF of a real pack, file by file.
Keep a clean copy of the original download. Create a working folder for the chosen scale, and copy only the parts you need into it. This avoids mixing, for example, a 1:12 tabletop with 1:24 legs when a pack contains many similarly named files.
Verify dimensions and inspect the mesh
Compare the imported width, depth and height with the listing. A 1,800 mm full-size table should be 150 mm wide at 1:12. If the slicer shows 1,800 mm, do not rely on automatic fit-to-bed scaling: set the intended dimensions deliberately and verify the result.
Use the scale chart when changing ratios. A 1:12 model becomes 1:24 at 50% uniform size, not at one twenty-fourth of the already miniature file. Every reduction also reduces the thickness of legs, rails and surface detail.
Look for disconnected objects, missing faces and unexpected internal shells. A file can contain several closed shells while still reporting as watertight. That may be intentional for separate parts, or it may mean that a decorative element is floating beside the furniture. Rotate the model and inspect the layer transitions around suspicious areas.
Orient the piece around its visible surfaces
For a table with a separate top, consider which face should be most attractive after printing and finishing. For a one-piece chair, compare the contact area at the feet with the support burden under the seat and arms. There is no orientation that is best for every furniture shape. The orientation and support walkthrough compares contact locations on two measured pieces.
Think about support removal while arranging the model. A support can be technically valid and practically inaccessible between a chair’s rear legs. A mark on the underside of a seat may be easy to hide; the same mark on a carved crest can be difficult to repair without losing detail.
For resin, inspect each new island in the layer preview and follow the slicer’s process for supporting it. Broad surfaces and enclosed cavities require particular attention. Do not hollow a tiny model merely to reduce the estimated material usage: trapped liquid and inaccessible interiors create additional processing problems.
Slice one piece and read the layers
Use a familiar material profile and change as little as possible for the first attempt. For suitable FDM geometry, 0.08–0.12 mm layers can be an exploratory range; for resin, 0.03–0.05 mm layers may be considered where the printer and material support them. These numbers are starting examples, not exposure or strength guarantees.
Move the layer slider through the entire object. Check that all four feet begin correctly, chair rails connect to the legs and the tabletop develops a complete surface. A thinner layer does not restore a feature that is narrower than the process can produce in the other axes. If a rail or edge has vanished, diagnose the thin part before changing settings.
Prusa’s layers and perimeters reference describes how perimeter settings and thin-wall handling affect the printed result. Record the actual nozzle and profile alongside your layer height; “printed at 0.1 mm” alone is not enough information to reproduce a piece.
Evaluate the first print before batching
Print one representative piece rather than an entire room immediately. Check it after the material’s required post-processing. Does it sit flat? Are all intended parts attached? Can it be handled without bending a rail? Are support marks located where you expected?
Compare the completed dimensions with the slicer values. Then place the miniature in the intended room beside an existing reference piece. A print can be technically successful but compositionally too large for the available space. It is much cheaper in time to discover that with one chair than with a full dining set.
Photograph the result with the underside visible as well as the attractive front view. Keep the photo, material, orientation and profile together. This record turns the first print into a useful baseline for the next revision.
Troubleshoot by changing one cause at a time
| Visible problem | First checks | Useful next experiment |
|---|---|---|
| A rail is missing | Compare mesh and sliced toolpath | Try a documented larger or reinforced version |
| A leg breaks during cleanup | Check support placement and removal direction | Move contacts or test a less delicate orientation |
| The table rocks | Inspect feet, first layers and final processing | Print one revised orientation before duplicating |
| A joint binds | Check dimensions, paint buildup and mating surfaces | Test the joint without finish first |
| Details look soft | Compare source geometry, slice and primer thickness | Change the stage where detail is first lost |
Avoid changing material, orientation, exposure and support density all at once. If the result improves, you will not know which change helped. Keep the previous working file and name each experiment with the single variable you changed.
If a model needs major geometric changes to work at your chosen scale, ask the designer for guidance or select a simpler design. Digital QA can identify some issues, but a watertight checkbox cannot certify material strength or successful printing on every machine. Once the first piece is repeatable, the remaining workflow becomes much more predictable: print, process, dry-fit, then move to the painting guide.
Common questions
Will every miniature file work on an FDM printer?
No. Check its geometry and the recommended scales. Thin rails or small ornament can disappear in the sliced toolpath or break during handling.
Does a watertight mesh guarantee a successful print?
No. Mesh closure is one digital check. Orientation, supports, feature thickness, material and machine calibration also affect the result.
From the cabinet
Try it with a real design.
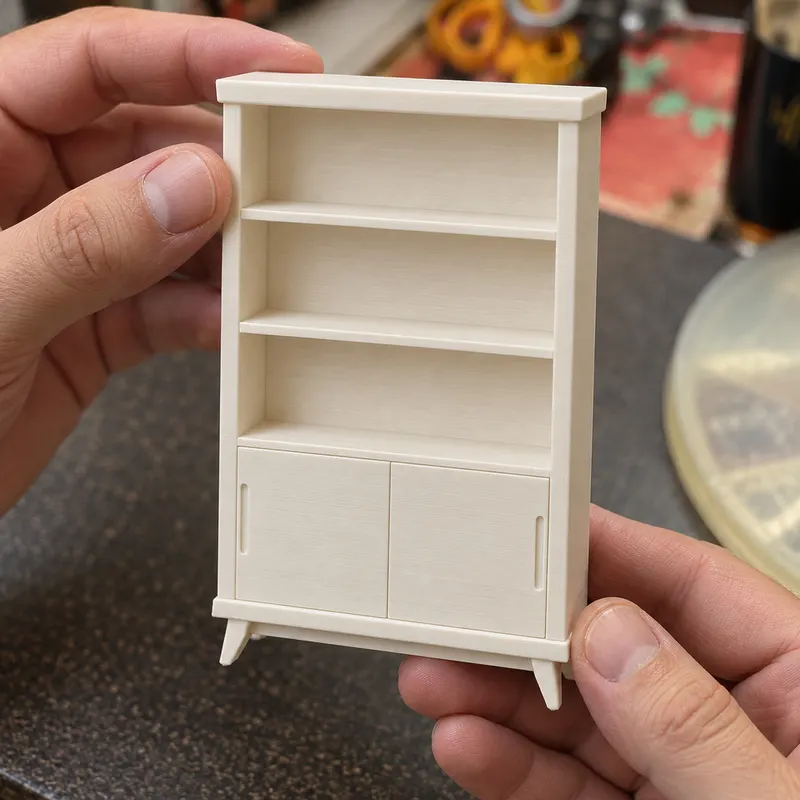
Mid-Century Architectural Library Bookcase
Inspect the shelving and inside corners in the detail views before deciding how to orient the file. Compare that view with your slicer’s layer preview.
- 1:12
- 106.5 × 32.5 × 166.7 mm
- 1:24
- 53.2 × 16.2 × 83.3 mm
Dimensions of the supplied files: width × depth × height. Room scenes illustrate the design; they are not physical print test records.
Check this piece’s details and sizes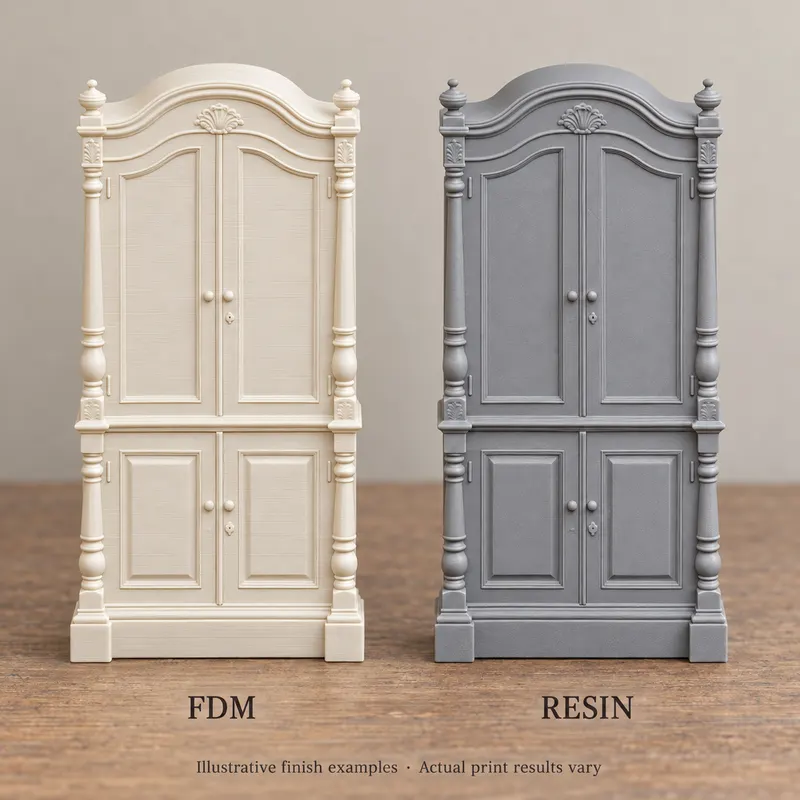
Victorian Arched Closed Display Cabinet
Read the notes for this closed display cabinet before planning a print. Decorative openings and mouldings should not be mistaken for working parts.
- 1:12
- 86.1 × 39.7 × 154.2 mm
- 1:24
- 43.1 × 19.9 × 77.1 mm
Dimensions of the supplied files: width × depth × height. Room scenes illustrate the design; they are not physical print test records.
Check this piece’s details and sizes