Maker’s notebook · 5 min read
Why small miniature parts disappear or break after resizing
Tell a part the slicer skipped from one that printed, then snapped. Compare mesh and toolpath, measure what shrank and use a supplied scale or sturdier design.
Updated
A missing chair rail can have two quite different causes. Either the rail was never printed, because the slicer could not draw anything that thin, or it printed and then broke: on the supports, in the wash, or in your fingers. Both end with the same gap in the finished chair, but they call for different fixes. A finer layer height will not help the first, and a larger scale may be the simplest answer to either.
This guide helps you tell them apart. Our evidence is digital: measurements of delivered files and references from printer makers. We have not printed these files, and we say so wherever it matters.
Find the missing feature
Work backwards from the finished print and note the first stage where the feature is missing.
- In the 3D view of the slicer. If the rail is absent here, the problem is in the file or its import, not in printing. Check that you opened the right scale and that nothing was cut off below the bed.
- In the layer preview. If the rail is visible in the 3D view but absent from the sliced layers, the slicer decided it was too thin to print. This is the most common case after resizing.
- On the printed part, before cleanup. If the preview showed the rail but the print does not, it failed during printing: it detached, warped or was never attached to a support.
- After support removal, washing or handling. If the rail printed and then broke, the problem is strength, not resolution.
Stages 1 and 2 can be diagnosed entirely on screen. Stages 3 and 4 need the print, and a photograph of the break helps if you ask a designer for advice.
Compare toolpath and mesh
On an FDM printer, the narrowest printable wall is tied to the extrusion width. Prusa’s modelling guidance gives about 0.45 mm for one perimeter and 0.9 mm for two with a 0.4 mm nozzle, and states that walls thinner than one perimeter are not printable. PrusaSlicer’s Arachne perimeter generator has a minimum feature size, and Prusa is explicit: “Features thinner than this value will not be printed.” It adds that features above that minimum are widened to the minimum perimeter width. So a thin rail can vanish from the toolpath, or print slightly fatter than modelled.
On a resin printer, the drawable limit is smaller, and failures shift towards stages 3 and 4. Formlabs’ Form 4 design specifications recommend walls of at least 0.2 mm and warn that thinner ones may warp or detach. Thin vertical wires can deform above a certain height: 0.3 mm wires up to 7 mm tall, 0.6 mm up to 30 mm. Formlabs also notes that thin walls can absorb washing solvent such as IPA and deform, so shorter immersion helps.
A thinner layer height changes neither limit. It refines the vertical steps, not the narrowest line the printer can form.
Measure what shrank
Uniform resizing divides every thickness by the same factor. Figure 1 shows it on the Mid-Century Lounge Chair: the thinnest 1% of its surface measures 1.23 mm on the 1:12 file and 0.66 mm on the separate 1:24 file in the pack, between one and two FDM perimeters. Quartered for 1:48, a size we do not supply, it would be about 0.31 mm: below one FDM perimeter and still above the Formlabs minimum wall.
If you resized a file yourself, recheck the resizing step: that guide walks through the same chair, including what our checks found on each supplied file. Compare your final dimensions with the source; a file resized twice, or scaled on one axis, will have thinner parts than you expect.
Choose a verified scale or a sturdier design
The simplest fix is size. A feature that fails at 1:24 may be comfortably within limits at 1:12, and some of our designs, 21 of 133 on 29 September 2026, are also supplied at 1:6. Piece pages list the scales in each pack and the processes our digital checks passed at each one. Those are the sizes we measured; anything else is your own variant.
The second fix is process. On 29 September 2026, 10 of our 133 single designs have their thinnest 1% of surface under 1 mm at 1:12. Five of those list FDM at 1:12 and five list resin only. The resin vs FDM comparison sets the two processes side by side.
The third fix is the design. A closed cabinet, a solid base or thick turned legs will survive resizing better than an openwork back or a slender stretcher. We do not thicken our own files across the board, because a blanket thickening can erase relief and close openings that belong to the design; where a piece needs strengthening, we reinforce it locally and measure it again. If you edit a mesh yourself, keep the original and compare the result at the scale you intend to print.
Finally, if a part breaks during cleanup rather than in the slicer, look at where the supports were. The troubleshooting table in the miniature printing guide suggests checking support placement and removal direction first, then moving the contacts or trying a less delicate orientation. The orientation and support walkthrough shows how to compare contact locations. Change one cause at a time, so you know which one mattered.
Common questions
The part is in the model but missing from the preview. Is the file broken?
Usually not. The feature is thinner than your printer profile can draw, so the slicer leaves it out. Compare its thickness with your nozzle’s line width, or use a larger supplied scale.
Will a thinner layer height save a thin rail?
Not if the rail is too narrow across. Layer height changes the vertical steps; the narrowest line a nozzle or a resin printer can form is a separate limit.
Do you test your pieces by printing them?
No. The shop owns no printer. Our checks measure the delivered files digitally: thickness sampled across the surface, islands, mesh closure and a PrusaSlicer pass. They are estimates, not print tests.
From the cabinet
Try it with a real design.
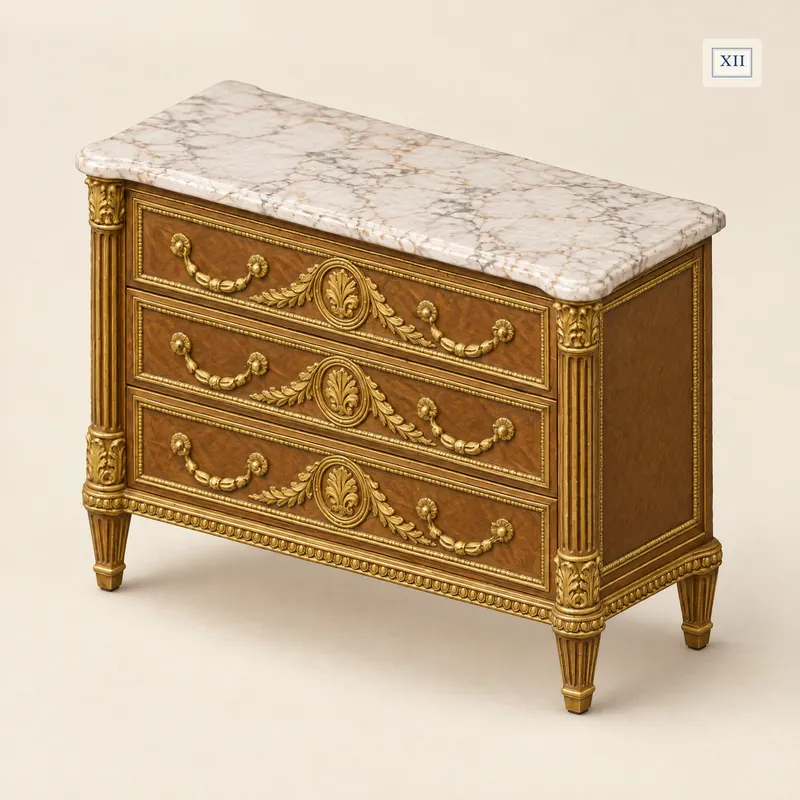
Louis XVI Marble Top Commode
The thinnest 1% of its surface measures 0.56 mm at 1:12. FDM is listed at 1:12 and 1:6 but not at 1:24; resin at all three scales.
- 1:12
- 100.0 × 42.0 × 73.6 mm
- 1:24
- 50.0 × 21.0 × 36.8 mm
- 1:6
- 200.0 × 84.0 × 147.2 mm
Dimensions of the supplied files: width × depth × height. Room scenes illustrate the design; they are not physical print test records.
Check this piece’s details and sizes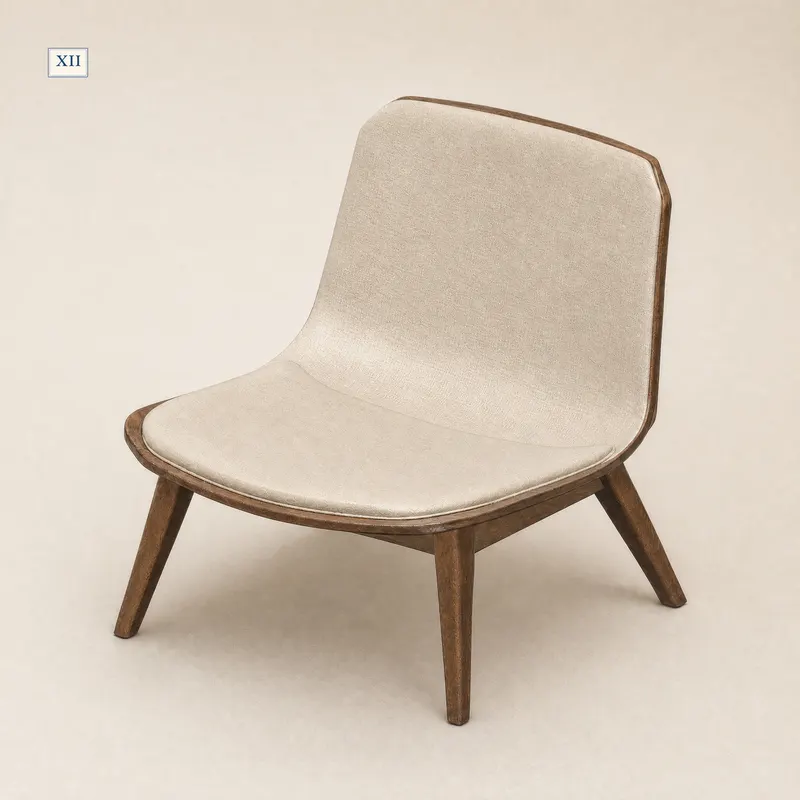
Mid-Century Lounge Chair
The chair in Figure 1: 1.23 mm on its 1:12 file and 0.66 mm on its supplied 1:24 file, which fails our FDM check.
- 1:12
- 65.6 × 70.8 × 65.9 mm
- 1:24
- 32.8 × 35.4 × 32.9 mm
- 1:6
- 131.1 × 141.7 × 131.7 mm
Dimensions of the supplied files: width × depth × height. Room scenes illustrate the design; they are not physical print test records.
Check this piece’s details and sizes