Maker’s notebook · 7 min read
Dollhouse furniture dimensions at 1:12: a practical cheat sheet
Plan a miniature room with example table, chair, bed and cabinet dimensions, plus a method for checking fit before printing.
Updated
A room becomes easier to furnish when every object has a footprint. Before downloading a whole collection, write down the available floor width and depth, then compare the table, chairs, storage and circulation space. This small planning step prevents a common disappointment: several individually attractive pieces that cannot share the same room.
The tables below use example full-size furniture dimensions, divided by twelve. They are not universal standards or ergonomic recommendations. A Victorian chair, a compact modern chair and a generous lounge chair can all have different proportions while belonging to the same miniature scale. Use these numbers to start a plan, then replace them with measurements from your actual products.
Read a dimension table correctly
In this guide, dimensions are written width × depth × height, in millimetres. Width is normally the left-to-right dimension when looking at the furniture from the front. Depth runs from front to back. Height runs from the lowest point to the highest point in its intended standing position.
For a chair, overall height includes the backrest; it does not tell you seat height. For a bed, overall length may include a projecting headboard and footboard; it is not necessarily the mattress length. For a cabinet, a cornice may extend beyond the main body. These differences matter when a piece sits tightly against a wall or underneath a staircase.
Whenever possible, keep both the overall size and the useful interior measurement. A 70 mm wide chair may have a much narrower seat between its arms. A cabinet that occupies 40 mm of floor depth may leave little space on its shelves once doors and back panels are included.
Living-room reference dimensions
These examples describe a reasonably compact furniture group. Change the full-size reference if your design calls for a larger sofa, lower table or deeper armchair; keep the scale conversion consistent.
| Example object | Full-size W × D × H | At 1:12 W × D × H |
|---|---|---|
| Three-seat sofa | 2,100 × 900 × 850 mm | 175 × 75 × 70.83 mm |
| Compact armchair | 800 × 850 × 900 mm | 66.67 × 70.83 × 75 mm |
| Coffee table | 1,000 × 600 × 400 mm | 83.33 × 50 × 33.33 mm |
| Side table | 450 × 450 × 500 mm | 37.5 × 37.5 × 41.67 mm |
| Low sideboard | 1,500 × 400 × 750 mm | 125 × 33.33 × 62.5 mm |
| Tall bookcase | 900 × 300 × 1,800 mm | 75 × 25 × 150 mm |
Notice how much deeper the armchair is than the sideboard. On a shelf display, two armchairs can consume more usable floor than expected. Try one chair angled slightly toward the sofa and leave the opposite side open for viewing. You can suggest a complete room without filling every visible corner.
A low coffee table can look correct beside one sofa and too low beside another. Compare the tabletop with the actual seat surface, especially when the sofa includes thick cushions. The relationship between adjacent pieces often communicates realism more strongly than their isolated dimensions.
Dining, bedroom and storage references
| Example object | Full-size W × D × H | At 1:12 W × D × H |
|---|---|---|
| Dining table | 1,800 × 900 × 750 mm | 150 × 75 × 62.5 mm |
| Dining chair, overall | 450 × 500 × 850 mm | 37.5 × 41.67 × 70.83 mm |
| Double bed, frame | 1,600 × 2,100 × 1,000 mm | 133.33 × 175 × 83.33 mm |
| Bedside cabinet | 450 × 400 × 550 mm | 37.5 × 33.33 × 45.83 mm |
| Wardrobe | 1,200 × 600 × 2,000 mm | 100 × 50 × 166.67 mm |
| Desk | 1,200 × 600 × 750 mm | 100 × 50 × 62.5 mm |
| Kitchen base unit | 600 × 600 × 900 mm | 50 × 50 × 75 mm |
Treat kitchen dimensions as a chosen design system, not a building specification. If several cabinets stand in a row, use one shared depth and worktop height. A collection assembled from unrelated files may need a separate worktop or plinth to make the row visually continuous.
For a bed, plan the space for bedding as well as the hard frame. A folded blanket can increase the apparent volume considerably. Keep the duvet away from delicate printed feet while handling the model, and consider painting the frame before attaching any fabric.
Plan a room with paper footprints
Imagine a room with an internal floor measuring 300 × 250 mm. At 1:12 it represents 3,600 × 3,000 mm. Draw that rectangle at actual miniature size. Cut out a 175 × 75 mm sofa footprint, an 83.33 × 50 mm coffee table and a 66.67 × 70.83 mm armchair.
Arrange those shapes before thinking about colour or decorative objects. Mark the opening, windows, fireplace and any staircase intrusion. The floor plan should show the furniture’s full footprint, including projecting legs, not just the seat or tabletop.
Now sketch a viewing line from the front of the room. A tall chair back near the opening may hide the fireplace you want to feature. Moving the chair a few millimetres can improve the view without changing the scale of any object. Take a phone photograph from the expected viewing height to compare arrangements. When the rough shapes work, turn the footprints into a room plan with measured gaps and sightlines.
Leave space for the way you work. A removable room box allows access from several directions; a deep fixed dollhouse room may require long tweezers. These are practical access requirements for your miniature project, not scaled recommendations for a real building.
When the layout works, use the room style guide to connect the furniture shapes, colours and wall treatment. Keep the measured plan beside you while comparing designs.
Check the details that an overall box misses
A bounding box is the smallest rectangular box surrounding a model in its current orientation. It helps answer “will this fit on the printer?” but cannot fully answer “will these objects work together?” Two chairs can share the same bounding box while having very different seat shapes.
For a dining group, compare seat height, arm height and the underside of the table apron. For a bookshelf, compare the shelf opening with the books you intend to add. For a wardrobe, compare the full height including decorative finials with the actual room ceiling.
A bundle’s maximum dimensions may describe the largest width, depth and height among its members. Those three maxima can come from different pieces. They are not an assembled room layout and should not be added to a plan as one solid rectangle. Open each member’s measurements and arrange its footprint separately.
Convert the cheat sheet to another scale
For 1:24, halve the 1:12 measurements. For 1:48, divide them by four. For 1:6, double them. Our example 150 mm dining table therefore becomes 75 mm, 37.5 mm or 300 mm wide respectively.
This works for dimensions, but printability needs its own check. A decorative rail that is sturdy at the larger size becomes thinner when reduced. A supplied smaller-scale version may contain intentional changes to preserve the design’s appearance or strength. Prefer that version when it is documented.
Use the scale conversion guide for a full resizing table, or the scale calculator for your own measurements. Keep the original file unchanged and save your adjusted version with its target ratio in the filename. A name such as desk_1-24_custom-width is more informative than desk_final2 when you return to the project later.
The 3D printing guide covers the next check: whether those small features remain suitable for the selected process and slicer settings.
Compare the listing, the slicer and the print
Use three checkpoints. First, compare the listing dimensions with your floor plan. Second, compare the dimensions after import into the slicer. Third, measure the first finished piece before committing to matching parts. If any checkpoint differs substantially, investigate before printing the whole set.
Sanding, paint and assembly can change practical fit. A locating pin and socket may fit before finishing and bind after several coats. Mask mating surfaces or test the intended finish on a spare joint. Do not solve a tight joint by globally resizing one component without considering what else changes.
Keep a short room inventory with the final measurements of completed pieces. Add the filename, scale, colour mix and any modifications. Your miniature home then has its own reliable reference system. When you add another cabinet or replace a broken chair, you can match the room you actually built rather than reconstructing it from memory.
Common questions
Are these official furniture standards?
No. These are explicit example dimensions for planning. Furniture varies by design, period and purpose; measure the actual reference or use the product’s dimension table.
What order are the dimensions written in?
Width × depth × height. Check the individual product diagram if its axes or assembly orientation differ.
From the cabinet
Try it with a real design.
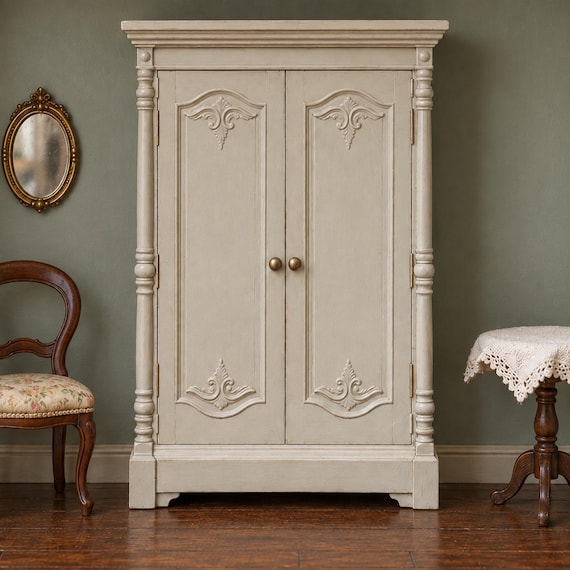
Victorian Panelled Double Wardrobe
Draw this wardrobe’s footprint on your room plan before adding a bed. Its height also needs clearance beneath the ceiling or a sloping roof.
- 1:12
- 122.3 × 57.4 × 166.7 mm
- 1:24
- 61.1 × 28.7 × 83.3 mm
Dimensions of the supplied files: width × depth × height. Room scenes illustrate the design; they are not physical print test records.
Check this piece’s details and sizes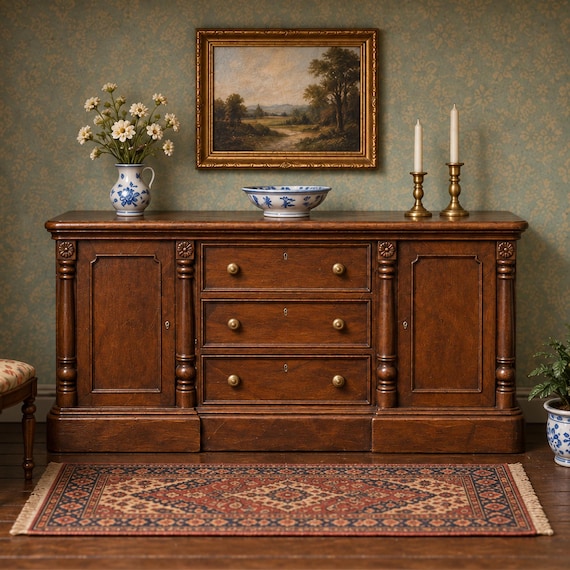
Victorian Dining Sideboard With Central Drawers
Place a paper rectangle with the sideboard’s width and depth against the dining-room wall, then leave room for the table and chairs in front.
- 1:12
- 150.0 × 56.2 × 68.9 mm
- 1:24
- 75.0 × 28.1 × 34.4 mm
Dimensions of the supplied files: width × depth × height. Room scenes illustrate the design; they are not physical print test records.
Check this piece’s details and sizes