Maker’s notebook · 5 min read
Planning a Victorian dollhouse room around a cabinet or sideboard
Place the sideboard first, keep clear space in front of it and balance carved storage with quieter surfaces. A measured 1:12 Victorian room plan.
Updated
| No. | Piece | At 1:12 (W × D × H) | At 1:24 (W × D) |
|---|---|---|---|
| 1 | Victorian Dining Sideboard With Central Drawers | 150 × 56.2 × 68.9 mm | 75 × 28.1 mm |
| 2 | Victorian Wide Lower Shelf Coffee Table | 100 × 42.5 × 33.8 mm | 50 × 21.2 mm |
| 3 | Victorian Wing Armchair | 69.4 × 62.1 × 95.8 mm | 34.7 × 31.1 mm |
| 4 | Victorian Arched Closed Display Cabinet | 86.1 × 39.7 × 154.2 mm | 43.1 × 19.9 mm |
Ornate storage is often the reason a Victorian room gets built at all. A sideboard with a row of drawer fronts, or a tall cabinet with an arched top, is the piece you want a visitor to notice first. It is also the piece that takes the most wall. Place it before anything else, and the rest of the room can be arranged to show it rather than hide it.
The plan above uses the same illustrative 305 × 254 mm room at 1:12 as our guide to plan a dollhouse room step by step, so the two layouts can be compared directly. The footprints are the measured sizes of four Victorian files from our catalogue: a sideboard, a coffee table, a wing armchair and a closed display cabinet. The positions and gaps are our choices for this composition, not rules.
Place the largest piece first
The sideboard (1) is the anchor. At 1:12 its file is 150.0 mm wide, just under half the back wall. Centred on that wall, it faces the open front squarely: the central stack of drawers and the cupboard on each side are seen straight on, which is what a symmetrical front needs.
Width is only half of the footprint. Check cabinet and sideboard footprints for depth as well: this sideboard’s file is 56.2 mm deep, so it takes more than a fifth of the room’s depth before anything is placed in front of it. Use the measured sizes of the files you will print, which are the figures on our piece pages and in the table under the plan.
A room with two storage pieces raises the next question: can they share the back wall? Here they cannot share it comfortably. The sideboard and the display cabinet (4) together need 236.1 mm of the 305 mm wall, which leaves 68.9 mm for every gap on that wall, and the sideboard could no longer be centred. So the cabinet turns against the right wall, in the back corner.
Protect the clearance in front of storage
Storage furniture is looked at from the front. In a full-size room you leave space to open doors and drawers; in a dollhouse they usually stay closed, but the same space keeps the front visible and lets your fingers reach it. In the example:
- Sideboard to table: 50 mm, which is 600 mm full size. That is more than the 37.5 mm left between the sofa and the table in our living-room plan, because this space is for looking at the sideboard, not for sitting.
- Chair to table: about 32 mm. The wing armchair (3) is turned side-on, 8 mm off the left wall, so its seat faces the table.
- Table to right wall: about 103 mm. The widest path in the room, and the one your hand uses to reach the back corner and the right-hand end of the sideboard.
- Sideboard to cabinet: about 38 mm. Enough for the two storage pieces to read as separate outlines.
- Table to open front: about 105 mm. A clear foreground, so nothing stands between the viewer and the sideboard except the low table.
Keep the low pieces in front and the tall ones at the back or against the side walls. The coffee table (2) is 33.8 mm tall at 1:12, just under half the sideboard’s 68.9 mm, so it sits low in front of the anchor instead of competing with it. The wing armchair is 95.8 mm tall, taller than the sideboard, which is one reason it stands against a side wall rather than in the middle of the floor.
It is tempting to fill every wall of a Victorian room. Try any extra piece on paper first, in the space it would really take. A second chair in the left front corner, for example, would stand in the foreground the viewer looks across.
Balance detailed and quiet surfaces
Three of the four pieces carry relief. The sideboard has its drawer and cupboard fronts, the cabinet an arched top with recessed upper panels, and the wing armchair button tufting on its back and wings. The coffee table is the quiet one: a smooth closed top over a simple apron and a lower shelf. That contrast is useful. A plain surface next to a detailed one lets the detail read at dollhouse size.
The walls work the same way. The wall above the sideboard is the one the viewer sees straight on, so a busy pattern there competes with the drawer fronts. A plain wall or a small repeat keeps the sideboard’s outline clear. The display cabinet, 154.2 mm tall at 1:12, stands in the back-right corner and hides that inside corner up to its full height. An inside corner is the hardest place to match the pattern at a corner, so decide the furniture positions before you paper the walls.
The files are supplied unpainted, so the balance of dark and light is yours to set. One wood tone shared by the sideboard and the cabinet ties the two storage pieces together. Keep strong contrast for the relief you most want seen. The painting guide explains how to plan the miniature finish in thin coats, so paint does not fill the recesses.
The same room at 1:24
All four files in the plan are supplied at 1:24 as well. Halve every figure: the room becomes 152.5 × 127 mm, the sideboard 75.0 × 28.1 mm and the clear space in front of it 25 mm. This is one difference from our mid-century living-room plan, where the credenza is supplied at 1:12 only. Check the scales on each piece page before you plan around a file.
If you have not yet chosen the direction of the room, start with dollhouse interior styles and come back to the plan once you know which piece should lead.
Common questions
Should a Victorian sideboard go on the back wall or a side wall?
On the back wall if its front is the detail you want seen, because the viewer then looks at it straight on through the open front. On a side wall it is seen at an angle, which suits a piece whose outline matters more than its front.
Can I build this room at 1:24?
Yes. All four files in the plan are supplied at 1:24 as well as 1:12. Halve every measurement: the room becomes 152.5 × 127 mm and the clear space in front of the sideboard 25 mm.
Is this a historically accurate Victorian room?
No. It is a composition built from our Victorian-direction pieces, planned for how a dollhouse room is seen. A researched period interior needs its own dated references for the room, the furniture and the decoration.
From the cabinet
Try it with a real design.
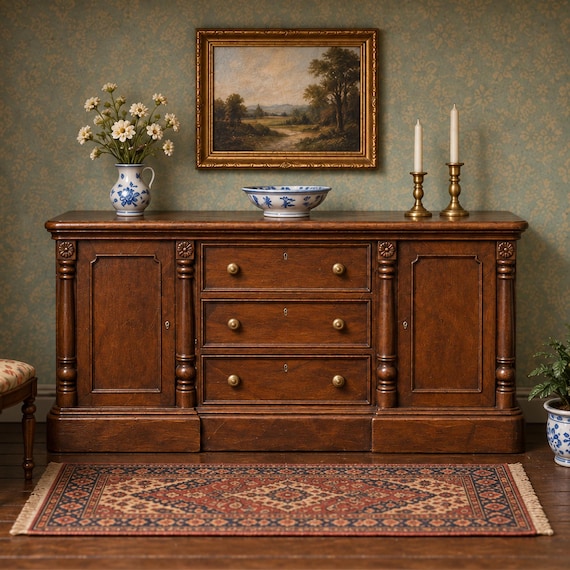
Victorian Dining Sideboard With Central Drawers
Piece 1 in the plan. At 1:12 its file is 150 mm wide and 56.2 mm deep; draw both on your plan, because the depth decides how much floor is left in front of it.
- 1:12
- 150.0 × 56.2 × 68.9 mm
- 1:24
- 75.0 × 28.1 × 34.4 mm
Dimensions of the supplied files: width × depth × height. Room scenes illustrate the design; they are not physical print test records.
Check this piece’s details and sizes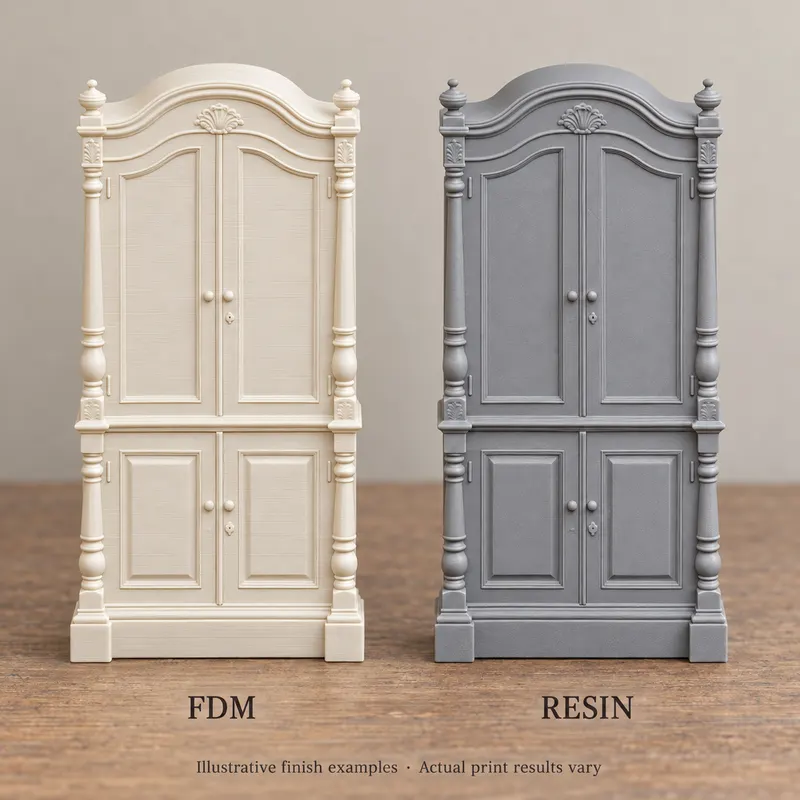
Victorian Arched Closed Display Cabinet
Piece 4 in the plan. At 154.2 mm tall at 1:12 it is the tallest piece in the room; compare that height with your ceiling and with any window on the wall where it will stand.
- 1:12
- 86.1 × 39.7 × 154.2 mm
- 1:24
- 43.1 × 19.9 × 77.1 mm
Dimensions of the supplied files: width × depth × height. Room scenes illustrate the design; they are not physical print test records.
Check this piece’s details and sizes